Showing posts with label practical. Show all posts

Sunday, 16 March 2014

Titles

In a previous post we explored the titles and typography, in the end decided on a few effects and transitions to use. I put these into our opening. Here the 3 step title sequence can be seen. They all have the same name, but are positioned in different places with different effects on them. We changed the font to 'Trajan Pro' as felt this looked similar to real horror film titles. E.g. The Conjuring.
In this image you can see that the middle section is a lot shorter. In this part, the bad tv effect is increased to 100, and the text is repositioned in the opposite corner. This gives the text a jolty look and adds to the possessed theme.

These are the settings that the last segment has, in each of the names used. Bad Tv is on the original 'amount', 15.38 after being on 100, however another effect 'flashing' is used to give the burnt out film appearance which reflects some parts in our sequence where quick flahses of pale colour and symbols appear.
Here the 'lighting' effect can be seen fully and it would then transition out with a fade. All the titles are in different places with the flashes occurring in different positions also. The text is overlayed over parts of the opening where Mia is comforting Neve. 

This is what we originally made:


Here are the titles applied to the opening:

-insert video-

Evaluation
I am very happy with this style of title as it looks professional and very similar to the 'Whitechapel' title that we were trying to recreate. However, this will probably get moved around and the speed changed to fit the whole sequence once the sound and editing is completed. For now, the titles are in place but we need to re-jig the order. 


Tuesday, 4 March 2014

Titles | Research and Practical

Our task for this week was to improve our titles and begin to implement them into our opening. We started by researching different ways in which we could make movements within the titles and took inspiration from the following (Whitechapel):
We liked the way the editors manipulated the text so it would flip, suddenly flash up, become larger and smaller etc. We wanted to recreate this type of text for our own opening.
We found this tutorial whilst searching for different effects we could use and we was interested in trying to replicate some of the movements, however we discovered you have to pay to get this software included in Final Cut Pro and so decided against it, instead we decided to use it as inspiration for our own movements:


We began by using a simple text box in Final Cut Pro, which was basic and plain, starting with the text in the bottom corner. We then put on the effect 'Bad TV' as we use this frequently throughout our opening and we wanted to keep a constant theme throughout, we changed the amount so it was a bit more noticable.
We changed the font to 'Trajan Pro' as felt this looked similar to real horror film titles. E.g. The Conjuring. As you can see below in the screenshot, we put in the actors name and applied the effect. We then manipulated the text in a different way.

 We copied the exact same text but as two different strips of video. Then we put one tiny short clip of text, which appeared for a fraction of a second (saying the same thing) in between.
 In the inbetween one we moved the position of the text to the opposite corner and applied the effect 'Bad TV' for a very short period of time but as a much higher amount, so it looks like it flashes up and goes very jolty and shakey.

Following this, in the longer 3rd clip we applied an effect which looks like a film burning out called '...' which can be seen in the video.


Here is what we made:


Evaluation
We are very happy with this style of title as it looks professional and very similar to the 'Whitechapel' title that we were trying to recreate. To improve we would like to make the text jolt backwards and larger and smaller like in the Whitechapel opening sequence. We also want to try adding in more quick flashes up or in slightly different places just to make it look even more impressive. However, this would require more professional skills and we'd have to download or install other software which could be costly. For now, we are happy with the results.


Friday, 21 February 2014

Transition Editing

 
In the beginning of our two minute supernatural film opening we had to put in an original film production company, our own film production company and our film name. We, as a group chose 'Warner brothers' as our original film production company, 'Fright Films' as our own film production company and 'The Possessed' as our film name. This is what it looked like before we added in any transitions when it was simple blocks with straight cut edits.


We then added the transition 'fade to colour' from final cut pro which created a slight fade between each bit of film, we also added 'breaks' (black spaces) in between the transitions to drag it out a bit longer so that it didn't go too quickly from one part to another and we thought this looked more effective overall.


This is what we ended up with:

 
Evaluation -
It took us a while to get used to using the transitions on final cut pro as we found them quite tricky to place where we wanted them to go at first. But we both agreed that using that particular transition along with the blank spaces made the beginning of our film opening look as effective and professional as want it to be. We want to continue editing this with the rest of our group to add any improvements they think can be made, and also to put some non-diegetic sound in the background of the film name.


Wednesday, 12 February 2014

Continuing Editing

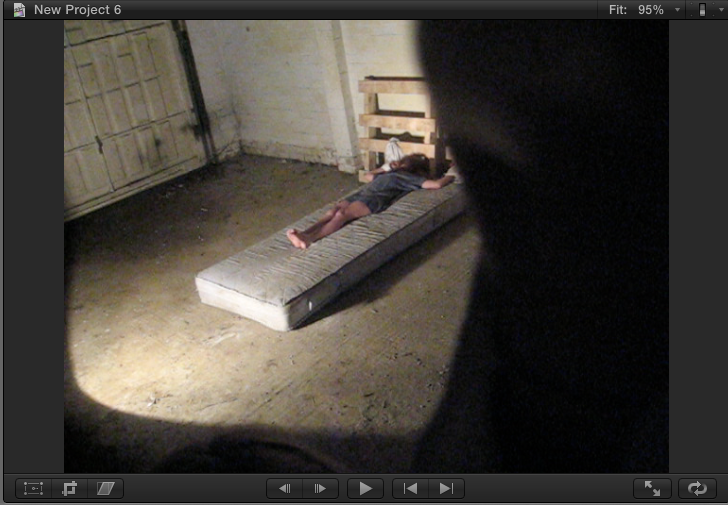
For my practical task this week I decided to continue editing our 2 minute opening. I left a gap between what was already done and the part I had started, which would be moved later. I decided to edit the part where the girl is going crazy and then the lights black out, there's darkness and then the lights come back on and the girl is no longer there.

Firstly I selected the clips I was going to use which required careful selection and comparison between clips. Then I used the blade tool to crop bits off that were shaky or too long, as this would make our sequence look unprofessional.

Luckily, when we filmed this part of our sequence we remembered to leave darkness for a few moments before turning the light back on, making the editing process a lot quicker and easier. I then stitched the sequences together. 

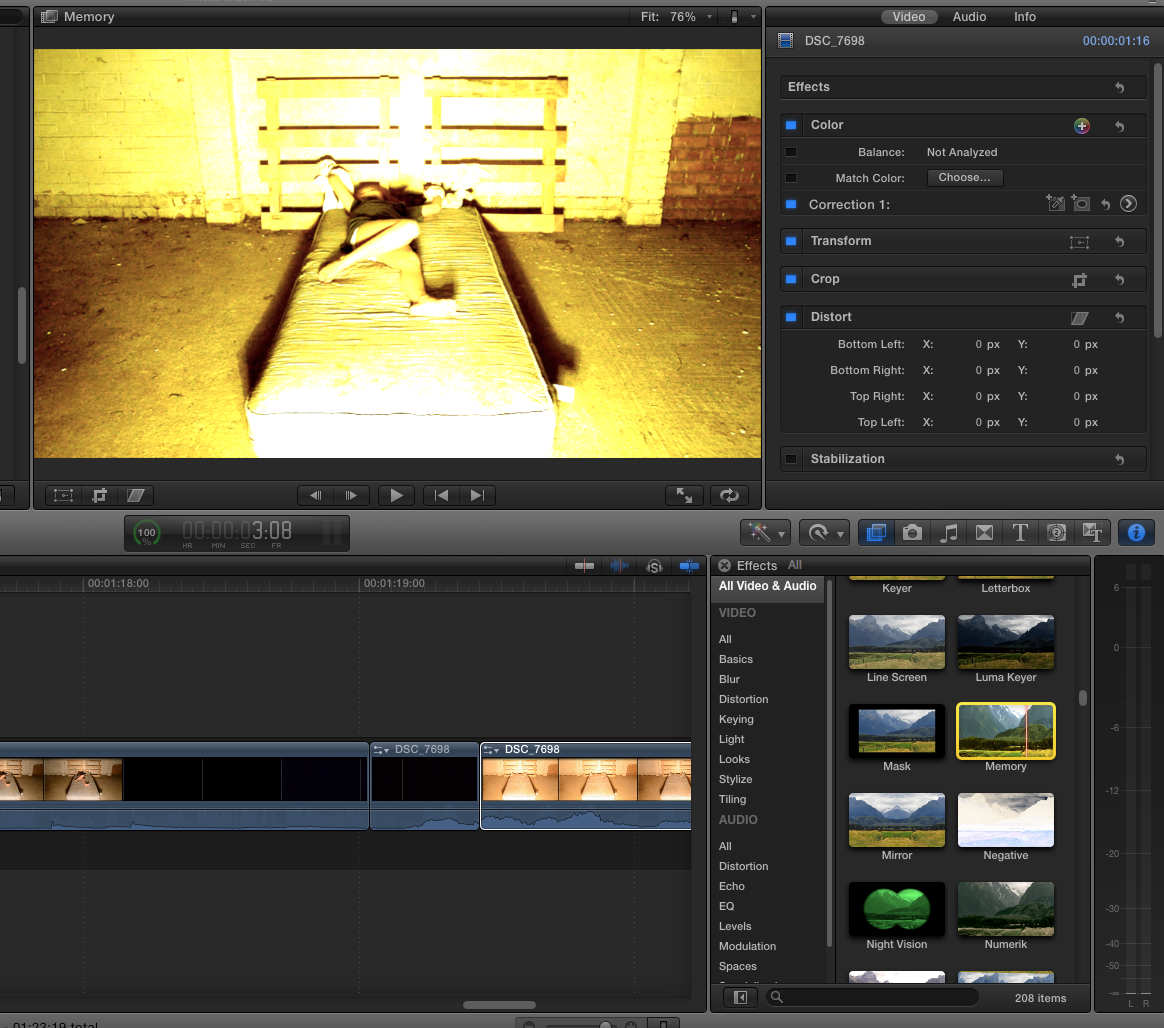
Following this, I played around with the colouring of the clip as the light slightly distorted parts of it, so this is one i looked at. It is obviously too yellow and in the end I decided on just adjusting the contrast and hues of the clip, if we are to use this in the end definitely then we'd have to apply it to all the clips.


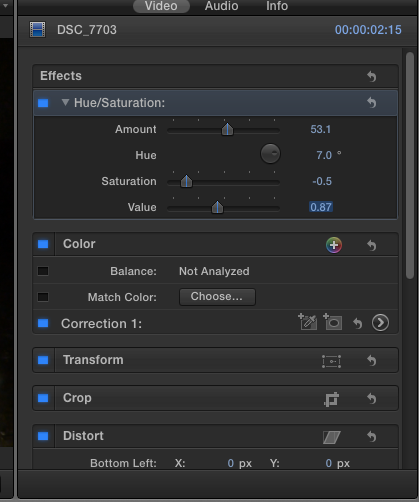
These are the settings I used for the clip in the end, I sightly adjusted the hue and saturation of the clip so that they match better, as seen when you watch it. However, in the next part of the sequence the girl jumps up in front of the camera and there is an issue; the lighting is slightly different, meaning we will have to use our editing skills to make this appear more professional.


After this, I detached and muted the audio. We will later add the sounds.

Evaluation:
Later when we come to edit this more, we'll have a non-diegetic sound, then silence, the a loud noise e.g. a boom when she jumps up. I liked the saturation etc that I used, however, this may prove a nuisance for editing the rest of the sequence, plus it may look weird in other lighting. I am pleased though with the results and want to now look for non-diegetic sounds to use over the top.
1.14 Onwards:

Monday, 10 February 2014

Possession Editing

Through research into films of the supernatural horror we noted that a simple yet effective technique to emphasise and add to the possession feeling was to take different segments from a long clip and put them in a different order in quick succession. This editing technique makes the movements of the individual seem much more jolty and unnatural which conforms more to the supernatural horror genre than a human's real movements.


We selected a relatively long clip which is made up of a single take and located parts of the clip which we found had good movements which were able to be edited well to good effect using this technique. The clip we chose is one of the raw takes from our opening sequence which features during the early stages of possession. 


During the first attempt, we separated two segments from the clip and changed the order in which they appeared in the clip. This first attempt resulted in the segments being far too long which did not make the character's movements seem possessed and unnatural. This meant that the cuts between the shots were not quick enough in order to create the desired effect. Also, the clips were taken from an area of the main clip which are too close together resulting in similar movements of the possessed character. This means that the audience would not be able to decipher the changes between the cuts as easily as if they were taken from more obviously different parts of the clip.


Our second attempt worked well as the segments were much shorter which meant they were much quicker when played back, giving a stronger sense of possession. Despite this, I thought that the segments could be shorter in length to speed up the changes between segments to further create a sense of possession within the character's movements.


The segments created were quicker which made the sense of possession feel much more intense and which conformed more to the supernatural horror genre. The quick cut edits between the segments made the overall clip seem much more unexpected and sudden which resulted in a much more possessed-like clip in general. The sudden nature of the editing used in the clip makes the possessed character's movement seem much more shocking to the audience and are made more effective than if we decided to use natural movements.


Even though we were satisfied with how the editing made the clip seem much more effective in how a sense of possession was presented, we decided to make the segments even shorter and put them in even closer proximity. This resulted in a more effective outcome as we concluded that when the segments are shorter and the clip is made more abrupt in general, the more possessed the character seems. The clip was trimmed at the beginning and end to only show the part which we edited and experimented on. The final clip from our experiment can be viewed below.


Sunday, 2 February 2014

First attempt of adding titles


We decided that the name of our film was going to be 'The Possessed' which then meant we were able to experiment with some title fonts. We put it after our production company but we are still undecided where it is going to be placed and whether we will overlap it with a piece of our filming. At first we looked at quite plain fonts to see what would look the most effective.


We both decided on a font we liked the best called 'Trajan Pro' as we thought it fitted our opening the best, we then added some effects to it such as 'Bad TV' which blurred it and made it jolt around like a recording camera, we thought this looked effective. But this is just one of many ideas we can try for our titles and discuss with the rest of our group.


This is a rough edit of the title put in with what we have edited so far, to show the full effect we have put on it:


Evaluation:
We both agree we like the font that we chose, and we will show it to the other two people in our group to see if they agree with us. If this is what we choose to use as our final titles, our next job will be to properly edit them in with the rest of our filming so it runs smoother than the example we have displayed above. We may experiment with some more font types and effects to see if we like any others better than the one we have chosen, but if not this will be the one we go forward with.


Friday, 31 January 2014

Opening Jump Editing

After researching different horror films, especially those of the supernatural horror genre, we concluded that a scary 'jump' into the camera by the possessed character is usually used at the height of a suspense-filled build up within a scene. This is designed to scare the audience by appearing suddenly very close to the camera in a single,quick movement. The effect of this part of a sequence is crucial as films of the supernatural horror genre generally rely on very scary and jumpy parts to make the film successful as it conforms greatly to the genre.

First we located the raw footage of the possessed character performing the jump. Our main objective to make the jump successful in the way it would affect the audience was to speed up the actual jump in the clip and cut it off to keep the character in shot for a very short time, causing it to feel very abrupt to scare the audience.


Although we wanted to speed up the physical jump within the sequence, we wanted to leave the build up where the room and bed are both empty at normal speed to make it look natural. In order to speed up the jumping part of the but keep the build up at its original and normal speed, we needed to separate the clip just before the jump in order to work with two separate clips and apply the different speeds accordingly. We did this using the programme, 'Final Cut Pro' and used the 'blade' tool to separate the clip. 

We then experimented with different speeds for the jump part of the clip and decided to speed it up to '147%' in speed (with 100% being normal speed). We thought this speed was effective as although it was scary and would bring out a reaction from the audience, the speed does not make the movement of the girl seem too unnatural. During experimenting with the clip by applying different speeds, we found some speeds (such as x2 the original speed) that made the jump seem unnatural and amateur-looking. 


We also decided not to apply visual effects to the general clip such as a darker filter to create a more eerie atmosphere, however we decided against this as we wanted the clip to visually fit into the finished opening of our film. We also understood that non-diegetic sound is a crucial part in creating a successfully scary effect and feeling however we have not yet created original sounds to accompany this part of the opening sequence and therefore could not yet add it into the clip until later on in the post-production stage of our opening sequence. 

Evaluation:

To get our chosen speed, a few trials had to be carried out. After noting that 'x2' wouldn't work well along with the other 're-time' options, we figured out that the percentage speeds were the best option. By changing the original percentage speed to 147%, this appeared more realistic and appropriate for the supernatural genre. Overall, although a few tests had to be carried out in order to identify our correct speed, the task went well, having finally selected our correct speed.  

Saturday, 25 January 2014

Editing To Create Possession

In my groups final piece, we want to be able to convey possessive movement. From my research into supernatural horror films such as 'The Devil Inside', possessive movement tends to be quite sudden. Below I have shown a step by step process of how I edited part of our preliminary filming to show possession. I used Final Cut Pro.  
I firstly uploaded our preliminary footages to Final Cut Pro.
I then selected the clip I wanted to use and inserted it into the editing bar.

By right clicking on the footage, a tool bar appears. I clicked on 'Retime' to adjust the speed of my footage.


I then chose the option of 'fast 2x'. I selected '2x', as speeding the clip up too fast would look unrealistic.
Below is my edited footage.

 
I decided to apply some effects onto my footage. I used 'Bad TV'. This gave the clip a distorted type effect, something commonly seen in Supernatural Horror films. I ensured that the 'amount' was not too high, as this would make the footage unclear.
Evaluation:
  • The task worked well, having applied these effects without major errors. My result of my sped up footage appeared to be quite typical of the supernatural genre, and therefore, can be used as a conventional tool.
  • For visual effects, 'Bad TV' can be useful as this is also another conventional effect in supernatural horrors. However, I must ensure that I apply it correctly by firstly, balancing the 'amount' used. Secondly, the effect should be used in places appropriate i.e. the possession scenes.

Thursday, 23 January 2014

Priest Collar

For my practical this week I attempted to create a Priest's collar ahead of filming on the weekend. After doing some research I attempted making the collar. In our opening we wanted a Priest to set up to camera and then start reading scripture or something similar, so we have to think about costume and what is the best way to get it across to the audience who the character is.

I watched this tutorial by a real priest to see if he had any tips on making temporary collars out of paper:


I tried his method:
I started with an a3 sheet of paper and folded into several times until it was about 1.5 inches wide and completely flattened it so it would be quite thin. I bent it a bit so when it was put round the neck it would be a smooth circle and not have creases. Then I stuck down the sides with sellotape as the priest instructs, and apply tape to one end so I can wrap it around my neck:
At this stage the collar doesn't look very convincing and is too big for my neck.


Evaluation: 
After putting a shirt over the top, the collar looks a lot better and more realistic. Obviously, in the real thing the priest character will be wearing an opaque black shirt so hopefully the collar will look quite good. The handy thing is, that with low-key lighting and hardly any time actually focused on the collar, it should look quite authentic in our final piece.


I also looked online for existing priest collars that we could consider purchasing, for example, I saw these on eBay which could help the costume look more realistic:

However, I think the homemade one will suffice as it would be a waste of money to spend £5 on a collar when we can easily replicate it with a piece of paper, especially as it will hardly be seen during our film.

Sunday, 19 January 2014

Editing the corner shots


Our task this week was to edit the 'corner shots' from filming. The shots are supposed to show a woman putting up a video camera ready to capture some of the possessive behaviour that she has been seeing, in an attempt to get some answers.


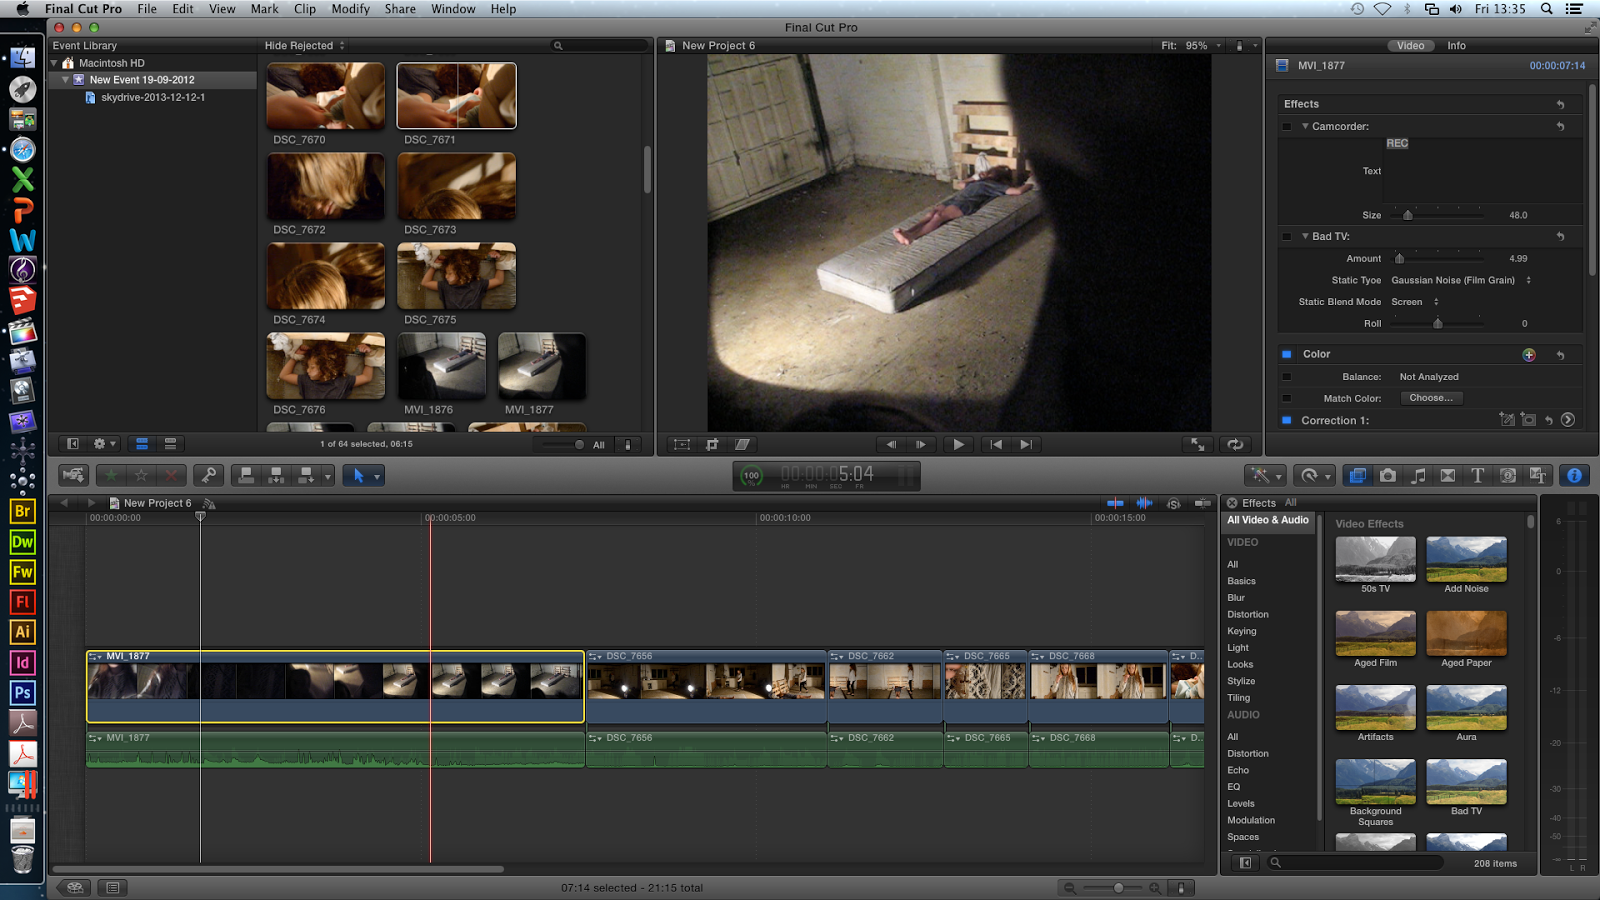
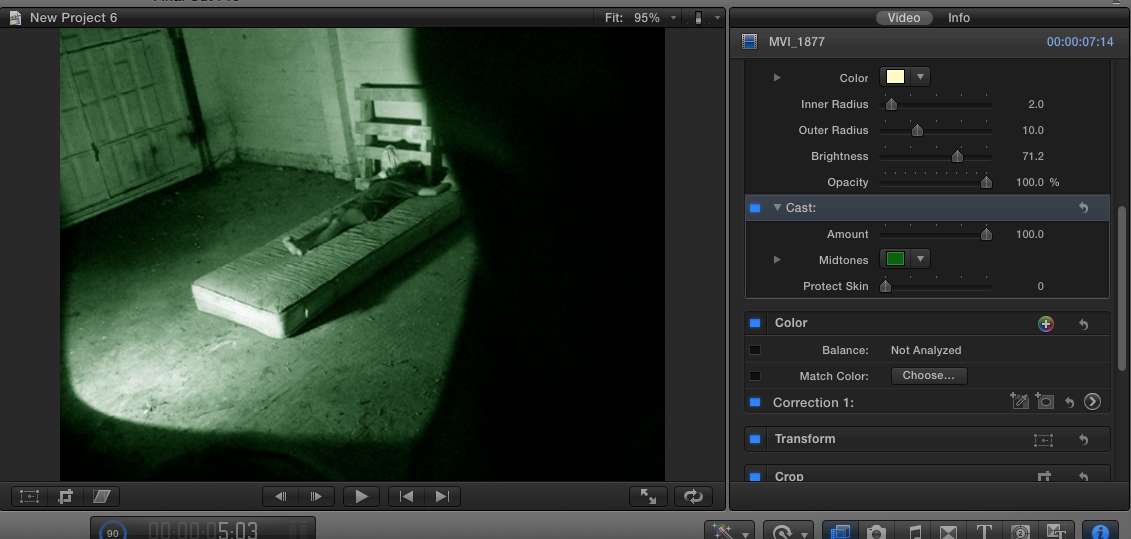
We took our original opening clip which looked like this and began exploring different ways to edit it so it looks like home made footage. We firstly tried a green filter to make it look like CCTV, but after trying that out we decided against it as we wanted it to look like a home video, not CCTV. In the image below you can see the colour we applied to the effect.


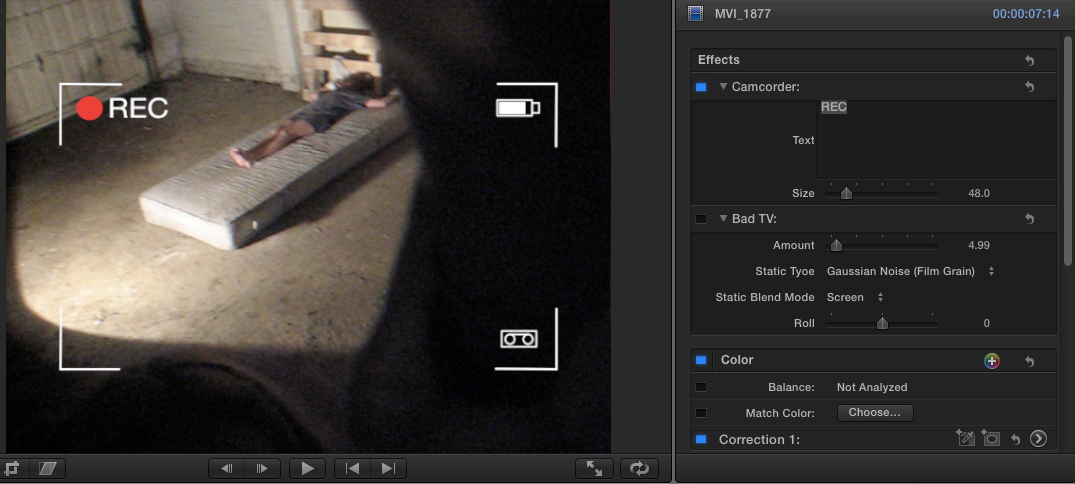
We then decided to use the camcorder effect on Final Cut Pro, which we felt made it look more like a home movie. We felt that this was more appropriate than the CCTV hue as it made it look more genuine.


We then added the effect 'Bad tv' but turned down the effect so it wasn't as noticeable and only gave the sequence a bit of movement, as seen in the two screenshots below.


The sequence that we made is below...


Evaluation
  • We like the Bad tv and camcorder effect together as it looks quite genuine
  • Could experiment with other colour hues though, not just green
  • Happy with the final outcome as looks like an authentic home video
  • When we come to edit the rest we should look to see how the footage looks with the other parts of the sequence and how they fit together.

Thursday, 9 January 2014

Making Objects Move

During our opening sequence we would like to 'make objects move' by themselves to add to the supernatural theme. During possession sequences, objects are often seen flying off surfaces and walls and books are seen being apparently flicked through. I looked at sequences from films to get an idea of the type of demonic movement I wanted to attempt to recreate:
In this clip the photo frames all appear to fall off the wall by themselves.

Here is a video I took ideas from as well, from a film maker on youtube:

Firstly I tried different ways to make a book look like it was being flicked through as in horror movies, often a book falls off a shelf and it starts being flicked through to get to a certain page. I thought that for a possession film it is likely to be a Bible. Unfortunately I do not have a large bible so I just used a big book for this blog post. I used a hairdyer to make the pages look like they were being turned over:
Obviously there is the sound of the hairdryer so that would have to be muted and non-diegetic sound would have to be played over the top.

I wanted to try and move a large object without having to do tricky editing as I do not have the skills or knowledge on how to go about doing something so complicated. Using the Film Riot video above as inspiration, I wanted to try moving a chair. I firstly began by just trying to push it without me in the shot, but this proved harder than I thought. Then I decided to try and change the camera angle, however this would still capture me in the frame. In the end I balanced my phone on a drawer on a chest of drawers in my house which captured the seat and a little bit below, so you can't see the floor in the frame. I then got a scarf and put it around the legs so I could pull it towards me. I did this at different speeds and then uploaded them to a free software called EZVid:
I manipulated the speed of the final clip in the video to see if it made it look more demonic. In my opinion the last clip in the video seems the scariest as it is a lot faster, it seems as if a supernatural force did it:

A problem with this however is that you can't see the floor so it doesn't look as impressive as in a film when a chair suddenly flies across the room. Obviously a film will have a huge budget which will cover special effects and editing and so I have to try and be creative. 

As well as this I overlapped a sound I previously made in a blog post to try and add to the scariness of the sequence, in the last clip it works best as the build up ends when the chair moves:

Soundclip - 

Sunday, 5 January 2014

Evaluation Of Filming Process

When arriving at our location, naturalistic lighting looked suitable enough for some light to enter through the Garage windows. Therefore, my group and I managed to reach our arrival time in order to proceed our project.
At first we had to clear out the Garage and get our props and mise-en-scene located. Clearing the Garage was not so hard, but painting over symbols such as smiley faces was time consuming. However, only a few of these were needed to be covered.
Once the painting had been complete, it's colour did contrast with the white. However, with the lighting and in the film, this did not hugely appear.
 
Initially, my group and I were going to use a tattered bed. However, a mattress was found and used instead. The mattress was an appropriate convention for our genre, as it was already quite old looking and tacky. Holly made the mattress even more conventional, by spreading bits of dirt across it.
After the Garage had been cleared out, and the mattress along with other props such as the wooden pallets, had been put in place, we were ready to film. Although it was darker than we expected when we began to film, our use of lighting helped us. Our light was powerful enough to make our mise-en-scene visible enough in the film. The light also gave our set a sinister look, being conventional to our genre.
As rope was hard to find, we decided to use pillow cases to form the conventional picture of the possessed girl being tied up. If these pillow cases were pulled too much, the pallets would fall down. Therefore, Mia's sister Neve had be extremely careful with her movement.

To signify a possessed girl, Neve had her hair covering her face. Costume was also used effectively to connote a young, innocent girl, vulnerable to possessive demonic forces. A grey nighty was used. The colour grey had connotations of eeriness, which would later suit her possessive character.
Our first footage was going to be filmed on a small digital camera, which had to be firmly placed at the top corner of a shelf. This was to ensure that the mattress was captured in the film. Setting the camera so that it would rest took us a few times to get right. Eventually however, after about three trials, we were ready to continue.
Jake was in charge of filming the rest of the film opening. He used his own Nikon camera with a tripod to give a firm, still footage. The tripod was set up well, supporting the camera well enough.
At one point, Jake had to film Neve showing signs of possession, but this was achieved through Jake detaching the camera from the tripod. Jake held the camera in his head and filmed a close up of Neve. Although this was slightly risky, as holding the camera single handed could may have caused this part to appear quite distorted, Jake ensured he held the camera firmly. This effectively minimised unnecessary movement in our film.
We wanted to include a substantial amount of camera movement as possible, one type of movement which we had to figure on the day was how to achieve a tilt movement. Jake managed to figure out what was needed to be done:
In order to achieve a steadie cam, Jake had to unscrew part of the tripod.

During our filming, we were worried if the light may have overheated. On the other hand, the light worked really well; constantly remaining bright and giving the set that conventional look.